Latest Posts

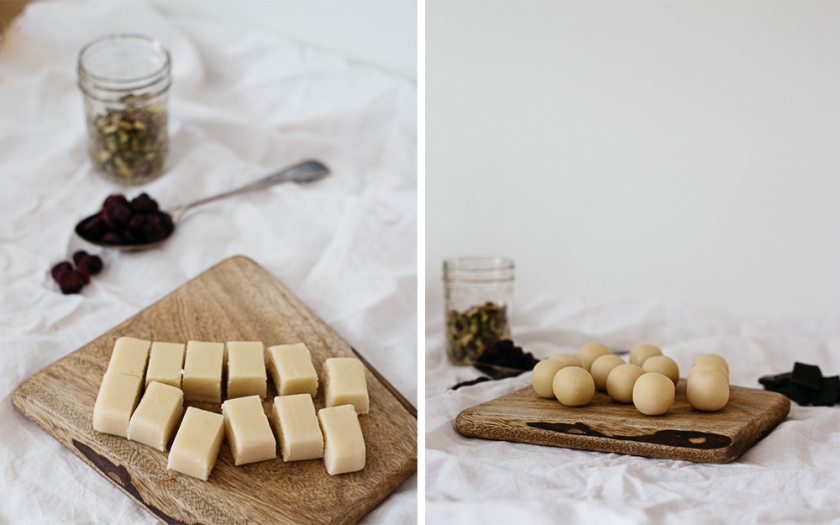
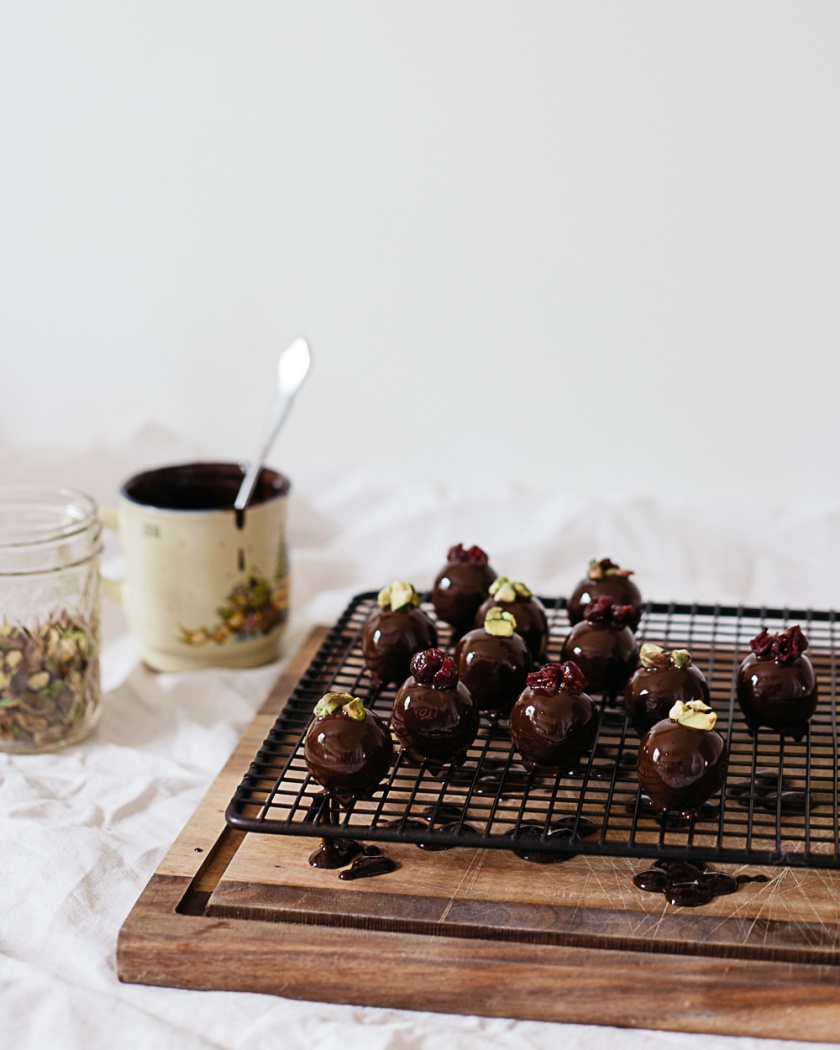
festive marzipan with cranberries and pistachio

festive marzipan | south by north

Growing up very close to my German granny meant all kinds of great things at Christmas time. Not only did I get to open some of my presents on Christmas Eve, but we also had the best food…  Stollen (with thick butter), lebkuchen by the bucketload, rumtopf (was rarely allowed to try this due to overproof alcohol content!), and of course tons of marzipan. I have very vivid memories of making marzipankugeln – rolling marzipan into balls, covering it in cocoa powder and giving them out as gifts. A pretty gourmet effort for a five-year-old.

26 years later, I felt like it was time to up my marzipan game. I’ve coated these in dark chocolate and topped them with cranberries and pistachios for a grown-up version of my childhood favourite. So easy to make, so easy to eat. Scroll down for the how to.

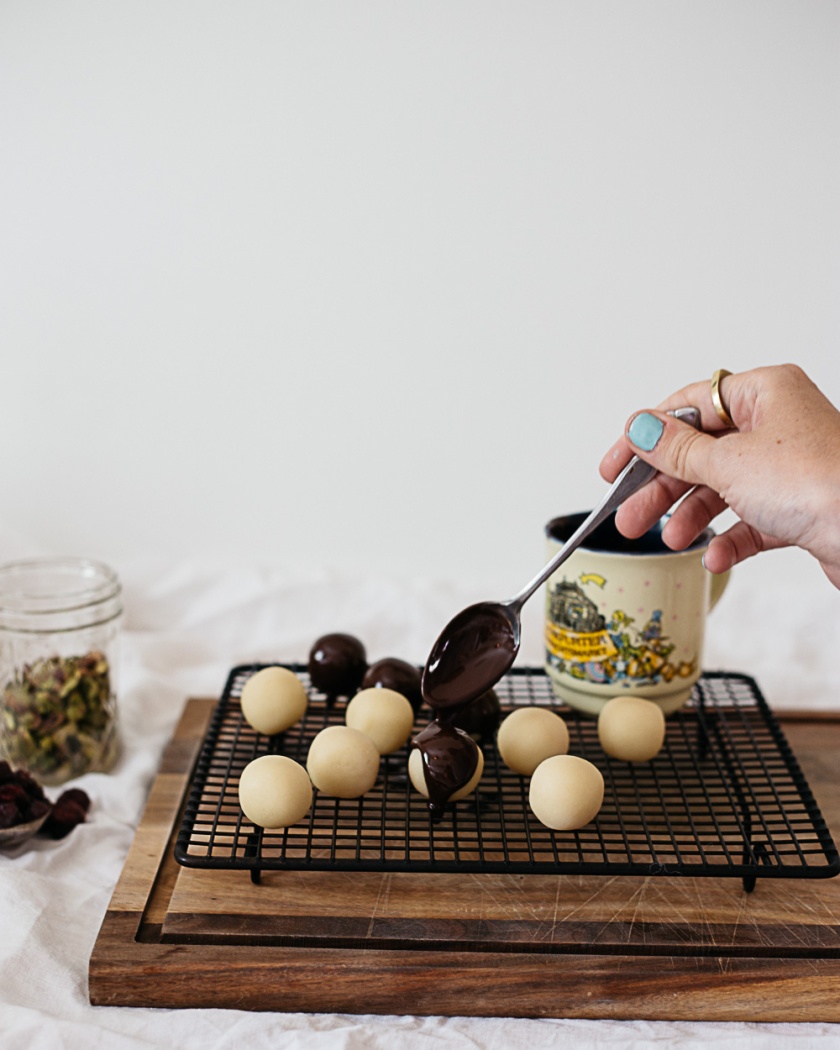
festive marzipan | south by north

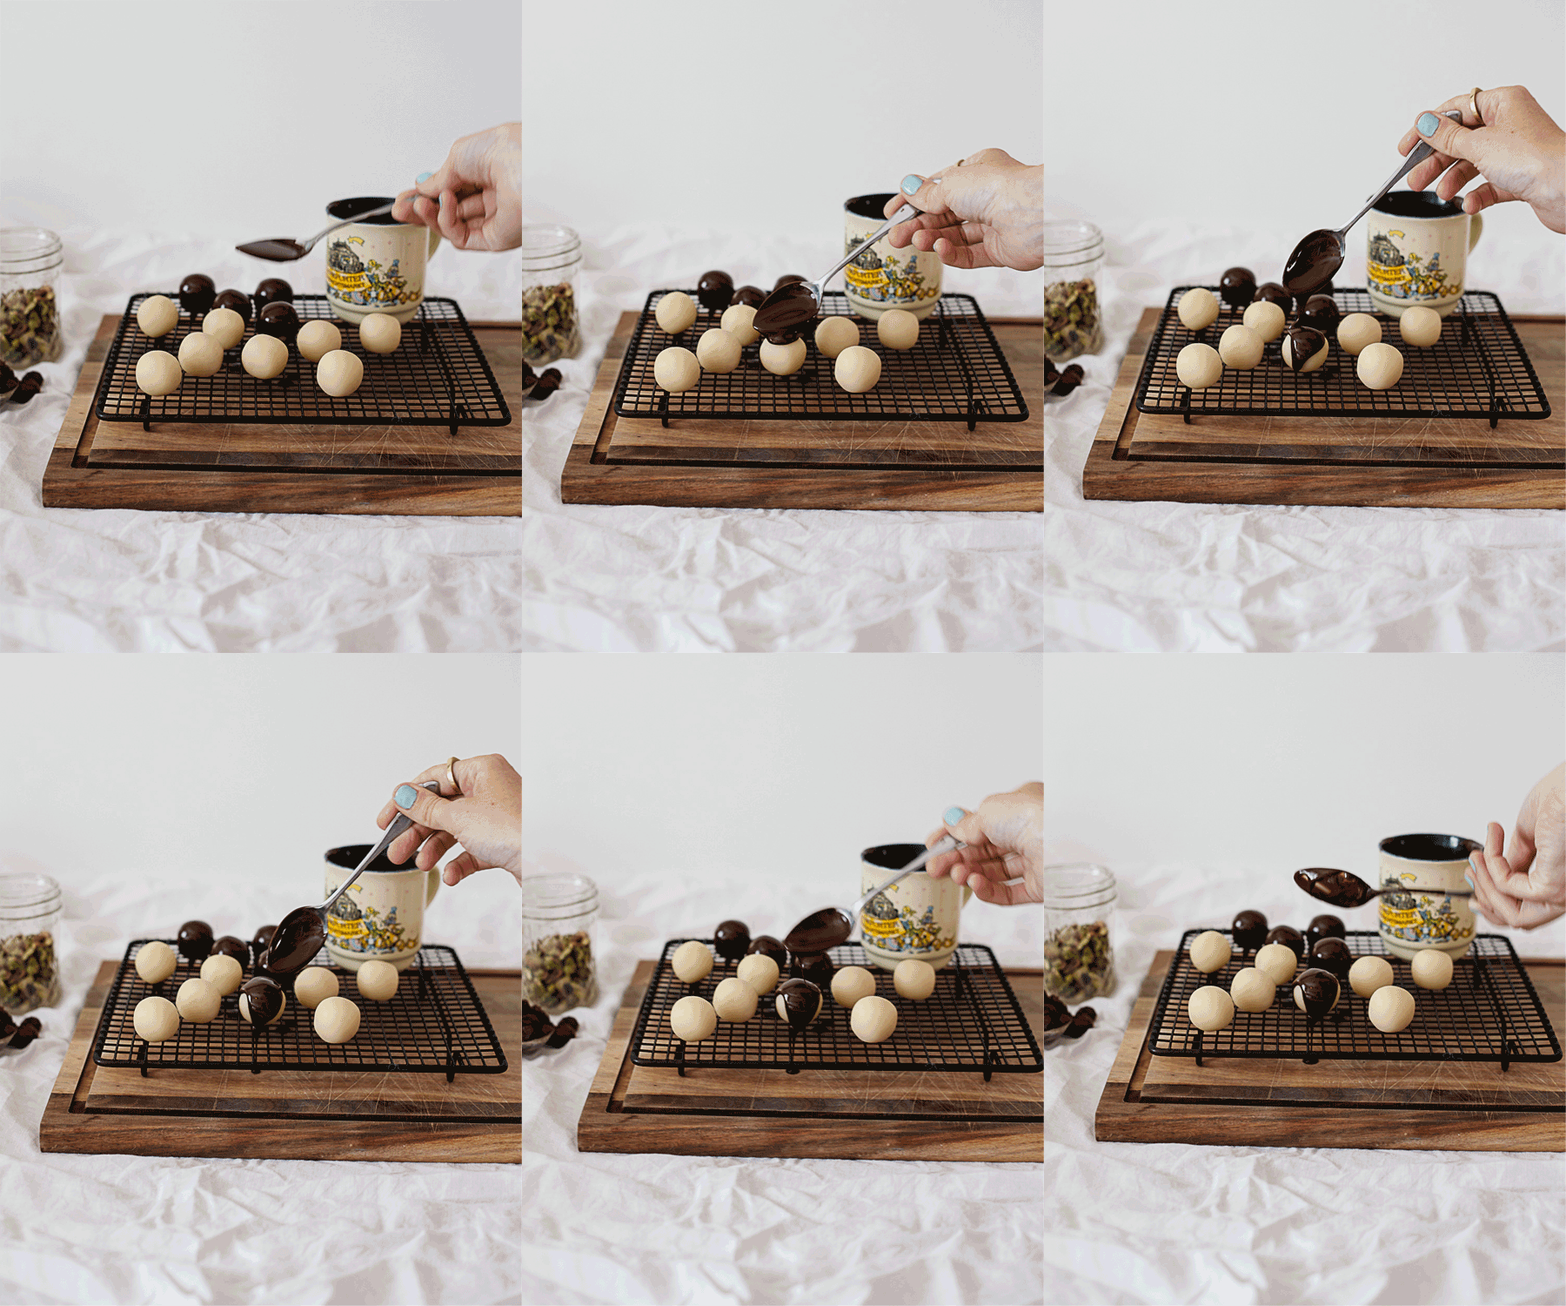
festive marzipan | south by north

festive marzipan | south by north

festive marzipan | south by north

festive marzipan | south by north

You will need:

– a block of marzipan
– dark chocolate, 85% cocoa
– Chopped pistachios and dried cranberries

Cut your marzipan block into equal sections, then roll each one into a ball. Put a handful of chocolate pieces into a microwave safe bowl, and heat for ten seconds at a time, stirring in between until it is fully melted (don’t let it boil!). Place the marzipan balls on a wire rack with something underneath to catch the drips. Pour a tablespoon of chocolate over each one, letting it run down the sides to fully coat the marzipan. While the chocolate is still liquid, top with chopped pistachio and dried cranberries, or whatever takes your fancy.

Leave your marzipan treats to set, then carefully remove them from the wire using a small knife.

P.S. Because I’m in Australia where it is currently scorchio, my chocolate was never going to set while out on the table so I popped it in the fridge. I am pretty sure they would have been more shiny if left out to set.

P.P.S. Did you spot my Frankfurt weihnachtsmarkt gluhwein mug?! I’ve had it for years, it’s the best.


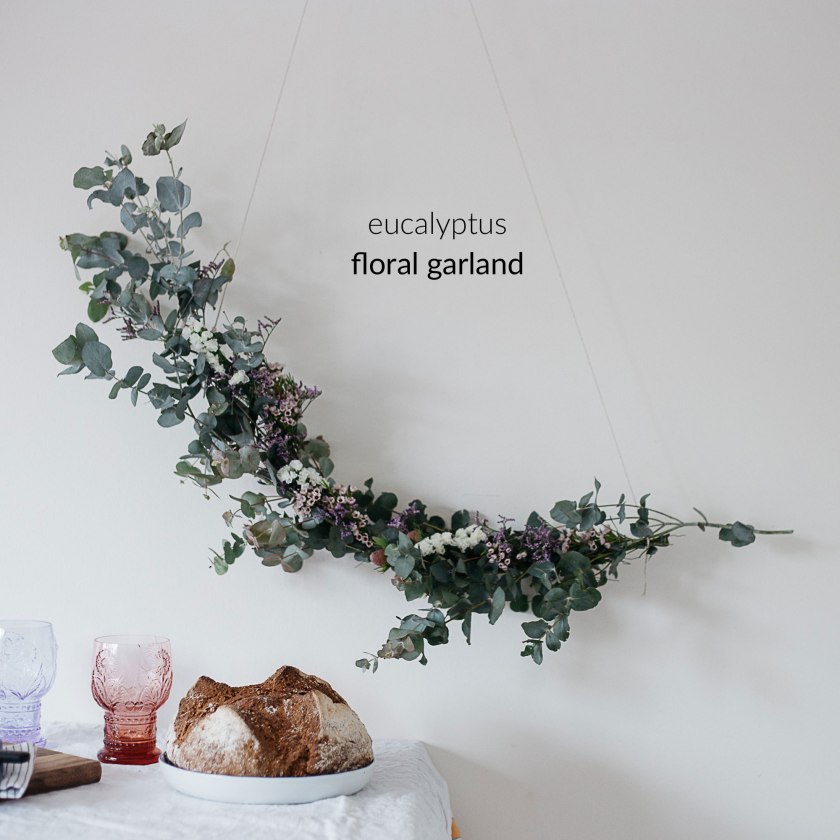
diy eucalyptus floral garland (+ video tutorial!)


Untitled-1

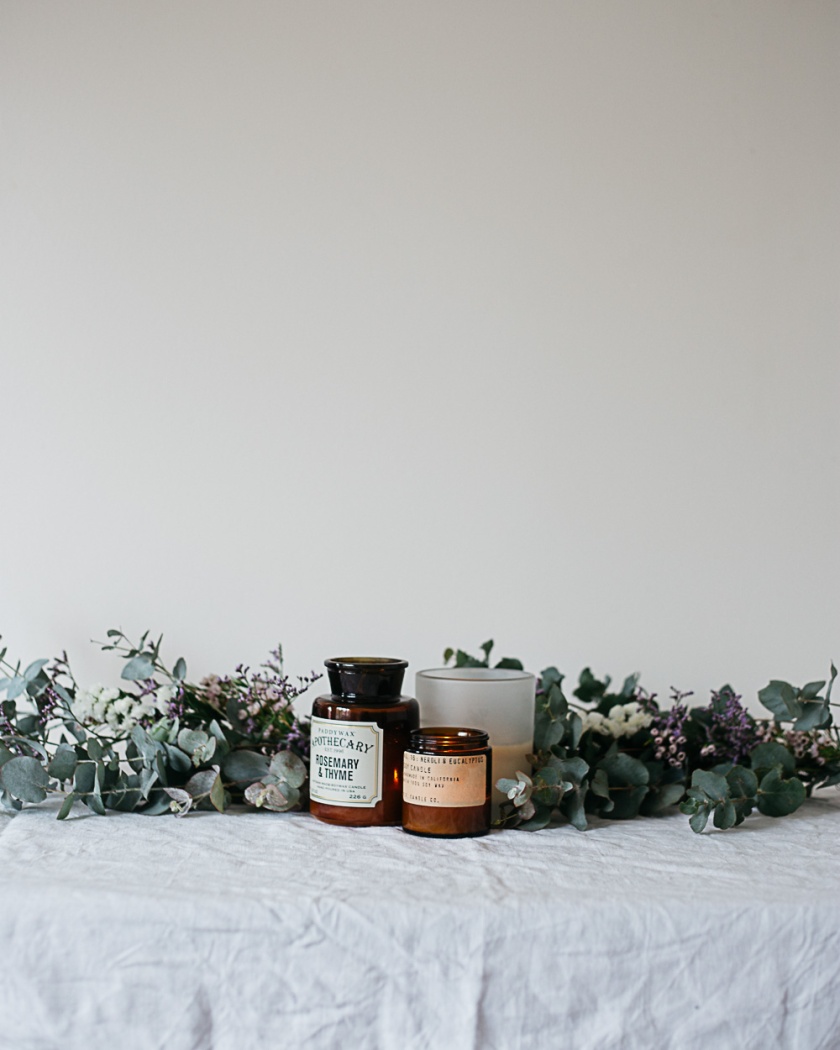
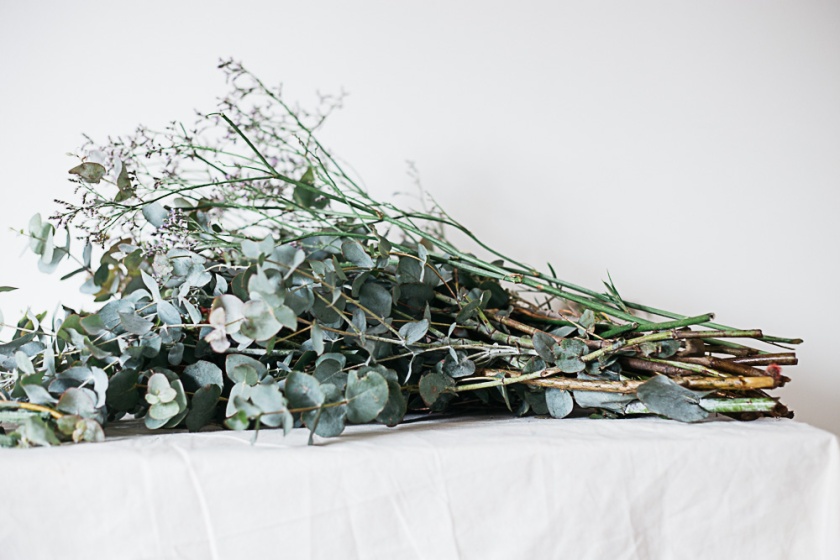
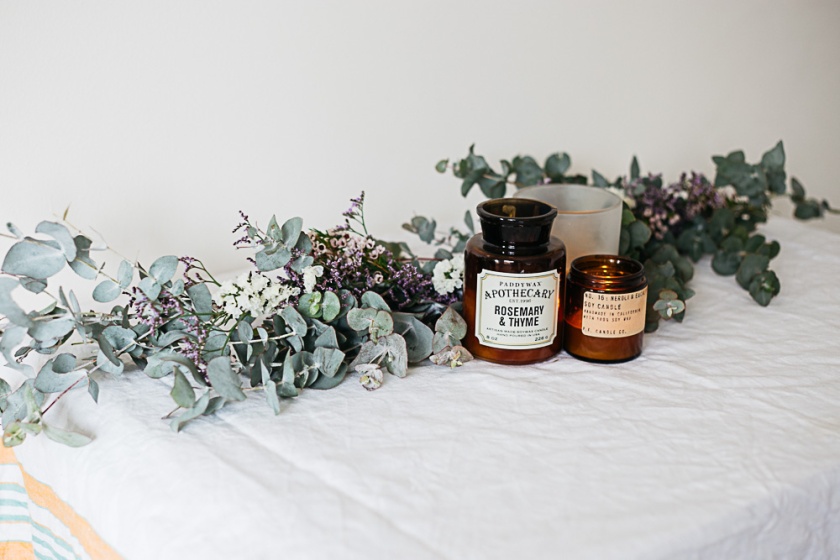
Last weekend was the annual ‘lose your mind at the flower market, make 47 wreaths and eat loads of food‘ day! The obligatory 47 wreaths were indeed made (more on that later), and banana split was eaten. After everyone left my place I decided to put together a festive garland with my floral leftovers.

A garland makes a great alternative to a wreath when you need something to fill a bigger wall space, and if you can’t hang things you can use it on a sideboard or table. It is festive but not super-Christmassy, y’know? In fact I could see myself making these throughout the seasons. This garland is still hanging in my lounge room a week later, and although it has mostly dried it still looks good.

I also decided to make my first ever video tutorial, which I am slightly nervous about… Please watch it and tell me what you think. Is it too long/short/weird? It was fun to put together so I expect I’ll do a few more in the future. This first try  has highlighted a lot of things I would change for next time. Mainly to get a tall tripod so that I don’t have to balance the camera on a stool which is also balanced on a chair!

Flower Garland from southbynorth on Vimeo.

IMG_7962

IMG_7946

IMG_7971


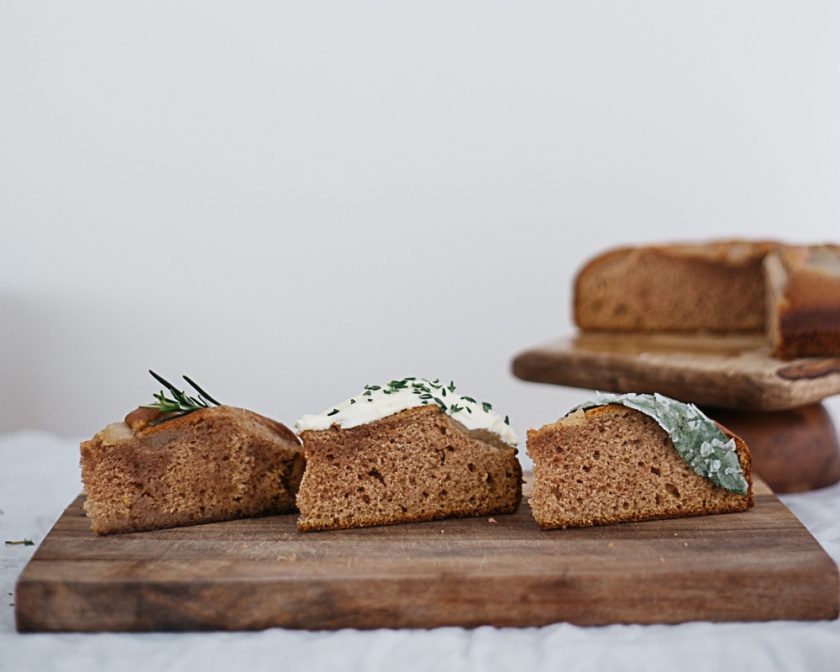
three ways to use herbs to decorate a cake

decorate a cake with herbs | south by north

I like my rainbow-funfetti-unicorn-sparkle cakes as much of the next person. I really do. But sometimes it’s nice to just keep things au naturel. Herbs can be so pretty and are much more flavoursome that candy cake decorations, so I wanted to explore some ways they could be used as edible decor, not just an ingredient.

Conveniently, I had a rather naked looking honey and pear cake that needed some jazzing up, but these techniques would work with any cake. Scroll down to see how I used herbs to make it pretty (and not a rainbow sprinkle in sight).

decorate a cake with herbs | south by north

Substitute sprinkles for finely chopped herbs

This one is kind of easy peasy. You can either finely chop the herb of your choice, or use tiny thyme leaves like I did. Be sure to pick a flavour that complements your cake. Once your cake is iced, just sprinkle ‘em on top. Jobs a winner.

decorate a cake with herbs | south by north

Rosemary infused drizzle

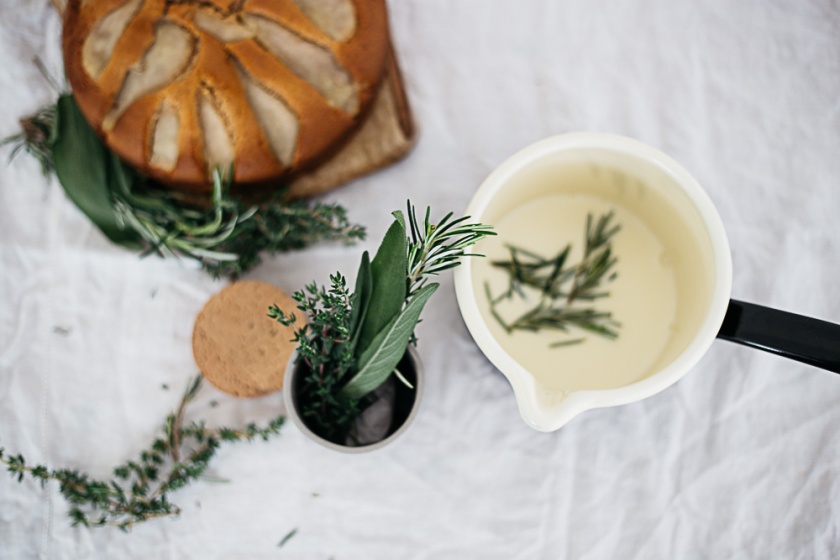
Put a few sprigs of rosemary into a small saucepan, and add just enough milk to almost cover them. Heat this very gently and remove from the stove before it boils. Cover, and leave to cool for a few hours. Once fully cooled, strain out the rosemary and discard (or just pick it out if it’s still intact). Add icing sugar to the milk a little bit at a time until you have a consistency you like, then pour over your cake. For extra drizzliness poke a few holes in your cake before pouring. This would work with pretty much any herb.

decorate a cake with herbs | south by north

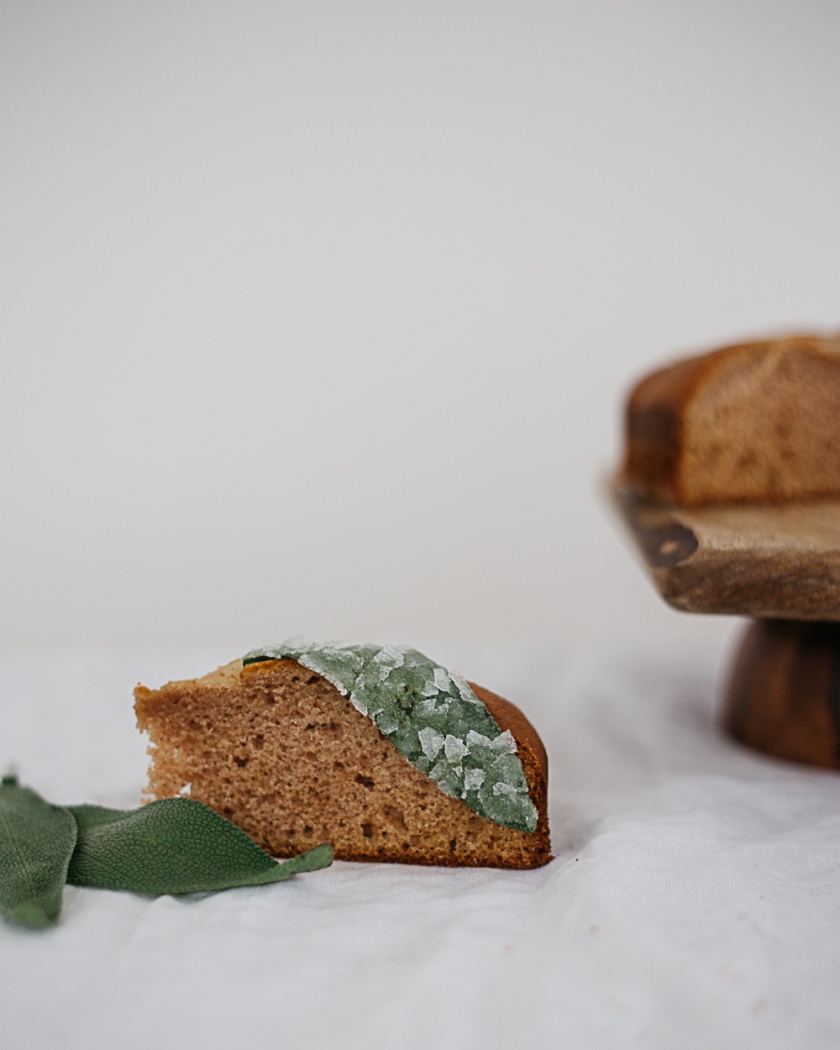
Crystallised sage leaves

This one is also easy peasy. Lay out all of the leaves you want to decorate, and one by one gently brush with egg white and dip into white sugar. the whole leaf should be coated but not saturated. for a cracked crystal look use fine sugar, and for a dusted look use larger grains. Leave these to dry overnight. (Before serving, make sure everyone is cool with eating uncooked egg whites).

If you are unsure of which herbs to pair with a sweet dessert, have a look through these ideas from Martha Stewart for some great flavour combos.

decorate a cake with herbs | south by north

how to make natural yoghurt

how to make natural yoghurt | south by north

We eat a lot of yoghurt in our house and I’ve been making my own for about 18 months now. It’s such a satisfying process and kind of science-y. I love that it gives me more control over the type of milk my yoghurt comes from (local, organic, whatever floats your boat) as well as working out so much cheaper.

There are two methods you can try to make your own yoghurt. Both methods involve heating then cooling your milk, adding culture and leaving it to incubate before fully setting in the fridge. The first is a basic, no equipment needed, but fiddly method that works well if you just want to give yoghurt-making a try, or make it occasionally. The second method is the one I use, and better suited if you plan to make loads of yoghurt and want it to be totally foolproof.

how to make natural yoghurt | south by north

Basic (but fiddly) method for making yoghurt.

You will need: a litre of fresh milk and a tablespoon of natural yoghurt, plus a sterilised glass jar or tub for storage.

Heat the milk slowly in a sterilised saucepan to 92°C, stirring to make sure that a skin doesn’t form. Best to use a thermometer for this as it is really important that the milk hits 92°C. As soon as it reaches the right temperature (don’t let it boil!), remove from the heat and let the milk cool to 40°C using the thermometer to check. Once the milk has cooled, stir in the tablespoon of yoghurt (this is the culture), pour into your glass jar or tub and put the lid on.

The jar of milk needs to stay warm at around 40° for 12 hours in order for it to turn into yoghurt. There are lots of ways you can do this (hi, Google), but lots of these ways didn’t work for me. Some of the more popular ones are; fill an esky/cooler with a couple of inches of boiling water then place your jar of yoghurt inside, place your jar of yoghurt in an airing cupboard or next to the radiator, or place the jar of yoghurt inside the oven with just the light on. When I first started out I wasted litres of milk trying different methods and ending up with a gloopy mess that definitely was not yoghurt. Having said that, do give it a whirl because lots of people swear by these methods. The one that worked best for me was to wrap my microwave rice heat pack around the jar, then wrap the whole thing in a big towel and leave it overnight.

After your milk has incubated for 12 hours, pop the lid off and check that it has turned to yoghurt. Don’t touch it, and try not to move it too much – do not stir! If it has yoghurted correctly (huzzah), leave the jar with the lid on in the fridge to set for another 8-12 hours.

You can use a spoonful of your homemade yoghurt as the culture for your next batch, although after a few batches the culture will be weakened and you’ll need to start again with store-bought yoghurt.

how to make natural yoghurt | south by north

Advanced (but foolproof) method for making yoghurt.

You will need a litre of fresh milk, yoghurt culture grains and a yoghurt warmer or slow cooker. You will also need a sterilised jar if you use a slow cooker.

Heat and cool the milk in a sterilised pan, according to the instructions in the basic method. Instead of adding the tablespoon of yoghurt to the cooled milk, add some yoghurt culture grains to the milk and stir with a sterilised spoon. If you have a slow cooker (set on low, 40°C) or yoghurt warmer, pour the milk + grains into it and leave for 12 hours to incubate. After incubation, pop the yoghurt in the fridge to set for 8-12 hours.

I have a yoghurt warmer which I LOVE and have heard great things about using a slow cooker in the same way. It guarantees that the milk stays at the exact right temperature and I have never had a failed batch. The yoghurt culture grains give a thick, tangy yoghurt every time. For me this method is better purely because we eat so much yoghurt and I want to be sure it will always work. This is the yoghurt warmer and culture kit that I bought around 18 months ago, the same tub of culture is still going strong so it is worth the investment if you are going to be making this on the reg. You can also buy the culture on it’s own from the same website if you are going to use a slow cooker.

Oh and before I forget! If you use long-life milk you don’t have to bother with the heating and cooling, just go straight in with the spoon of yoghurt or culture. Booya.
five things I learnt from the konmari method.

the konmari method | south by north

As someone who ‘struggles’ to keep on top of my clutter and tends to leave my junk all over the house, I was pretty keen to read Marie Kondo’s cult book, The Life-Changing Magic of Tidying Up to try and kick myself into shape.

When I finally read it I was just blown away by it’s simplicity.  The basic idea is to go through everything in your entire house in a certain order, discarding anything that doesn’t spark joy. Everything that you keep is stored properly and neatly in a designated spot, and when you open a drawer or cupboard you should be able to see everything inside without having to shift things and rummage around (she has some great methods for achieving this!).

Now, I am not going to rehash the full details of the KonMari method as you can find out about it all over the internet and frankly you should just read the book! What I would like to tell you is how it went for me.

It has now been about a month since I KonMari-ed, here are five things I learnt.

One | Messy people can be reformed.
Messiness is not part of my DNA! Hallelujah! This is actually a huge relief and a bit of a shock, as I was secretly always worried that I could never change. Over the years I have gotten a lot better and was by no means hideously messy, but I can confidently state that the KonMari method has totally reformed me. It’s like a switch has flipped and tidying is no longer a chore – everything has a place, and everything goes back in it’s place. So simple. Gah.

konmari method | south by north

Two | I don’t need three muffin tins.
If like me you make muffins approximately never you probably don’t even need one muffin tin, so please tell me why I owned three? Also, no one needs three sellotape dispensers. I honestly thought we just had one that kept spontaneously moving around – this is clearly a ridiculous state of affairs.
What I am trying to say here is that excess stuff is kind-of gross.  Following the KonMari method really highlighted the items that ‘spark joy’ and what was ready to head out the door. It is a freeing but eye-opening process, and certainly makes you think twice about bringing more objects into your home in the future. If I contemplate buying something I find myself asking. ‘where will I put that?’ and ‘does it really spark joy?’. This tends to mean I leave empty-handed which is a lot better for my bank balance. 

Three | Having a tidy home makes you feel nice.
Since we tidied our house I feel like one of those people on an advert for fruit tea, all leisurewear and woollen throws and scented candles. Seriously though, I can’t stress enough how calming for the mind it is to know that there is no clutter in our flat. I can tell you where everything is, and we know exactly what we own. I truly feel more motivated and energised when I’m at home. Even getting dressed in the morning is more enjoyable – when I open my drawers and cupboard I can see everything inside (special KonMari folding and hanging techniques) and there are no more messy piles of t-shirts or three dresses on one hanger.  

konmari method | south by north

Four | Being messy is pretty annoying for everyone.
When your idea of tidy is not quite the same as your living partner’s, it can create really unnecessary stress for both sides. Now, along with the clutter, that stress has practically disappeared and our tidiness levels are much more even.

Five | It’s good to appreciate the things you own.
Giving everything you own a proper place to ‘live’ and making sure that all of those things spark joy really makes you appreciate your stuff a lot more. I have been wearing more of my clothes, using more of my kitchen utensils and generally enjoying my things a lot more. Everything is easy to find and nothing is hidden away and being forgotten.  

It’s been about a month now and we are still going strong. Ok so the laundry is not always folded right away but still, that is a minor indiscretion compared to before. I probably sound like a total crazy saying this, but sometimes I open the cupboards and drawers just to see how lovely and neat everything looks inside…yeah…can’t believe I am admitting that but there it is! I have well and truly drunk the (tidy) koolaid.

blood orange meringues with blood orange and passionfruit curd

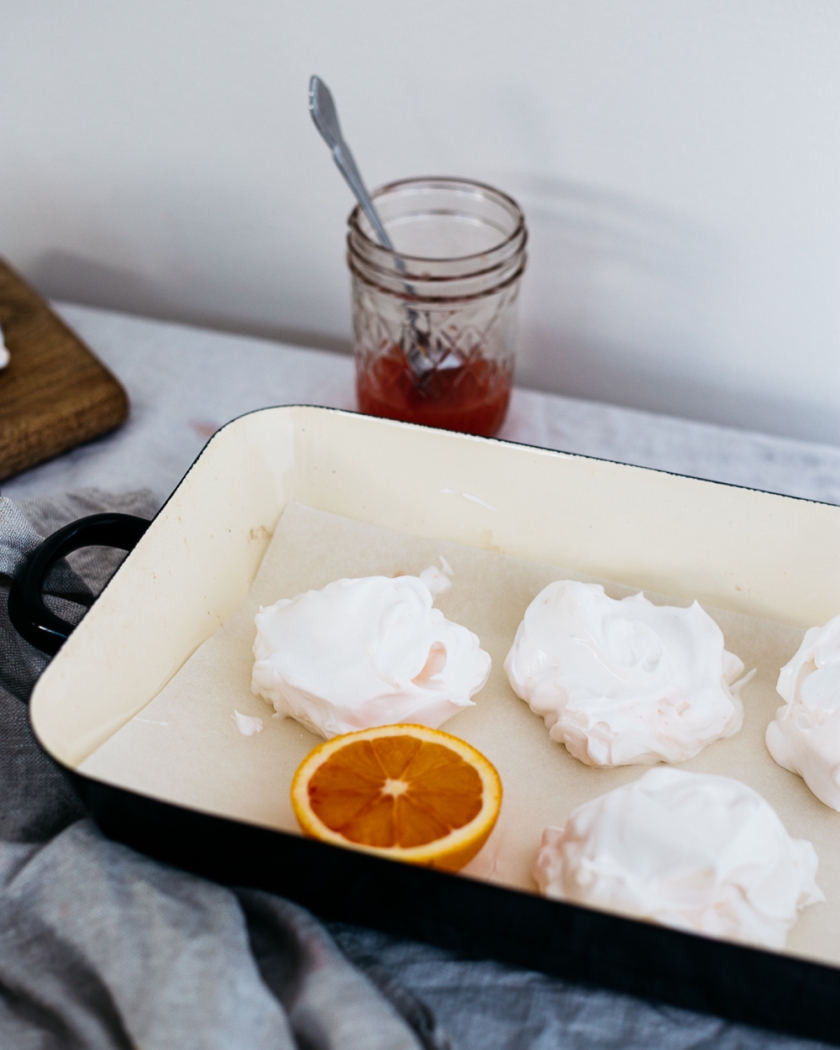
blood orange meringues with blood orange and passionfruit curd | south by north

When you are lucky enough to acquire a brand new Kitchenaid and six blood oranges in the space of time between breakfast and lunch on a Saturday, you know that it’s going to be a great weekend. That was last weekend, folks.

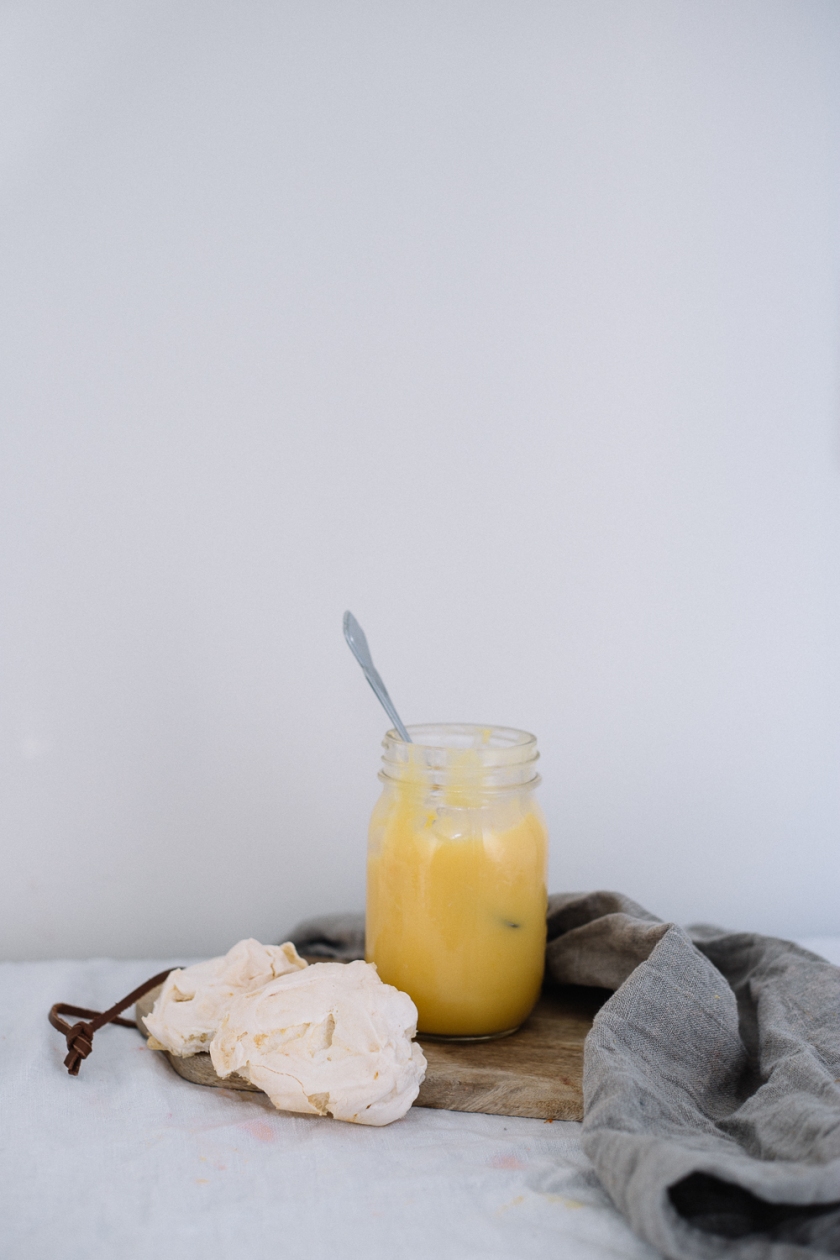
There was really only one thing to be done – put the two together and make some blood orange meringues. And then when you realise that you also have some passionfruits and it really would be quite nice to have something to dollop on top of the meringues, well then you make curd.

Scroll down for the how-to.

p.s. I totally realise that this is the first time I’ve posted in four months. If you are reading this, thanks for sticking with me. I’ll be following up with a few thoughts on the future of this blog in the next week or so, but for now, yay new blog post!

blood orange meringues with blood orange and passionfruit curd | south by north

blood orange meringues with blood orange and passionfruit curd | south by north

What to do:

Preheat the oven to 110°C (or 230°F), then whip up some classic meringue. To make four individual sized meringues I used three eggs whites and six heaped tablespoons of sugar. To make more, just use two tablespoons of white sugar per egg white.

In your stand mixer (woohoo, I can finally say that!) whisk the egg whites until they are fluffy and have doubled in size. Add the sugar slowly, one tablespoon at a time and keep whisking until the sugar is fully incorporated. To check, stop your mixer, use a clean metal spoon to take out a tiny amount of mixture and rub it between your fingers. You shouldn’t be able to feel a lot of sugar grains. The meringue mix should be glossy, and stand up in stiff peaks.

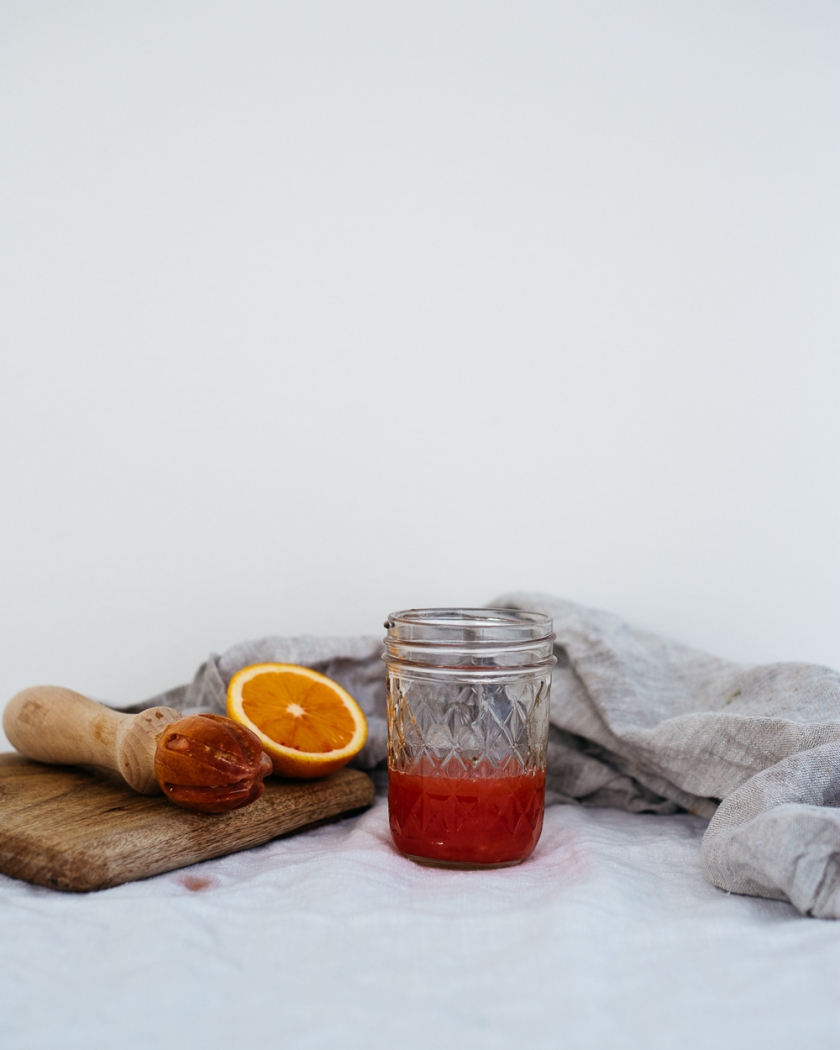
While you mixer is mixing, squeeze the juice from three blood oranges. Once your meringue is ready add a couple of teaspoons of juice to the meringue mix, using a clean metal spoon to fold it through. Put the rest of the juice aside. Be careful not to add too much juice, as the liquid will mess with the structure of your meringue. The orange flavour comes through very strong so you really don’t need much.

Spoon mounds of meringue onto a tray lined with baking paper, using two metal spoons for dolloping and shaping (if needed). Did I mention you will need lots of metal spoons for this?!

Turn the oven down to 90°C or 194°F and bake the meringues on the middle shelf for 90 minutes.

In the meantime, make your curd. This was the first time I have ever made curd! It turned out really well. I followed this recipe, but I substituted half of the passionfruit pulp for blood orange juice. To get a pip-less curd like mine, push the passion fruit pulp though a fine mesh sieve.

Once baked and cooled, serve the meringues with a generous heap of curd, and prepare to see them disappear in five seconds flat.

diy: how to weave a basket from paper

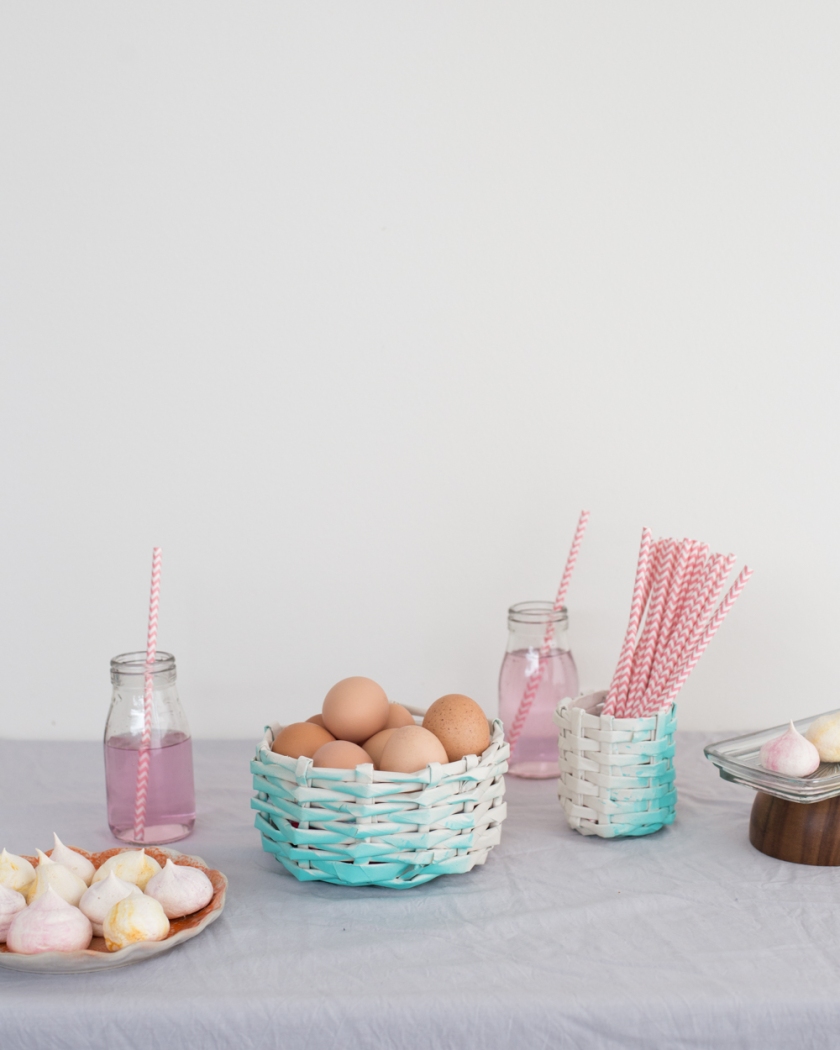
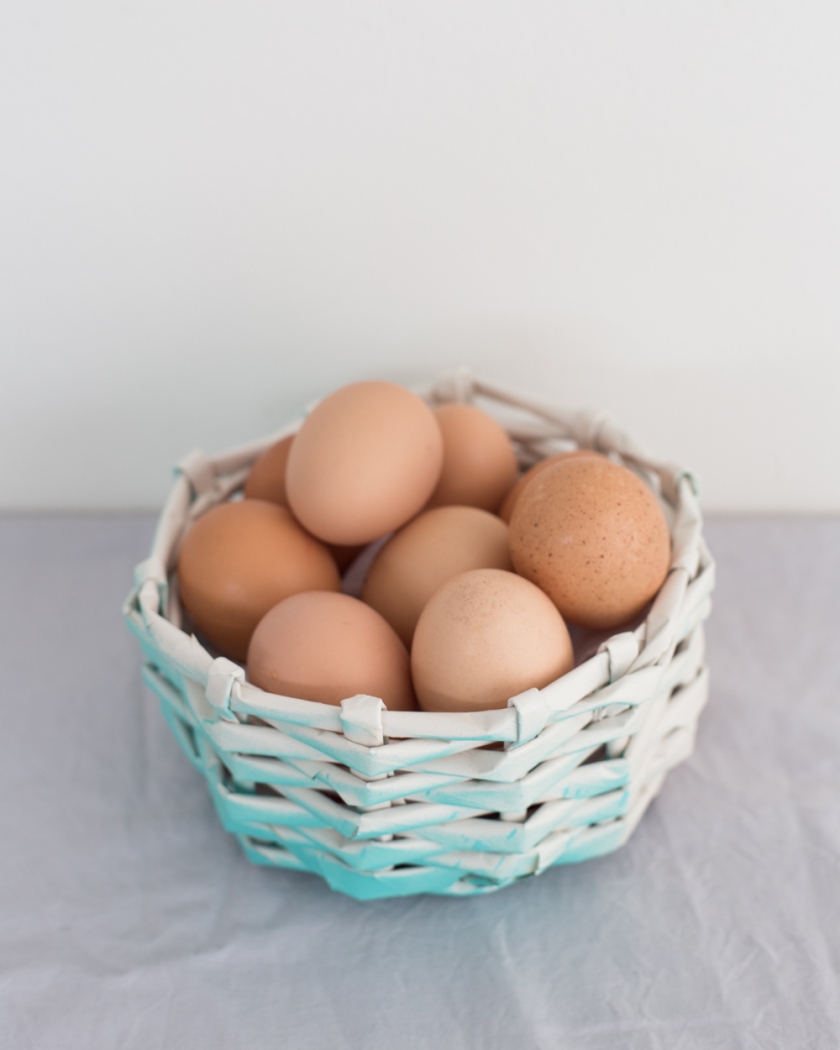
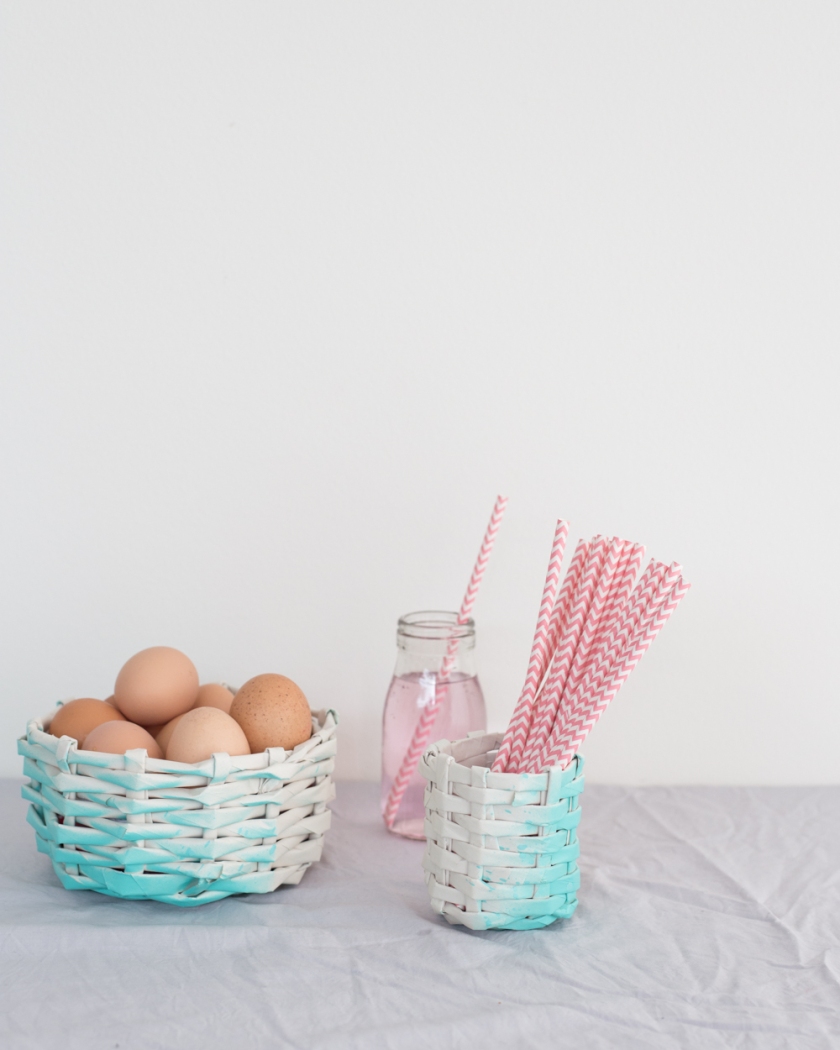
diy baskets | south by north

I’m going to put it out there, this is one of my favourite ever diy projects. I know I know, that’s a big call but I’m going with it. Why do I love this project so much? Because those baskets are just made from paper, plain, regular paper — how awesome is that?! There is something so satisfying about taking a simple material and turning it into a functional item using just your hands (and a wee bit of glue).
So, if you need a quick and easy easter display or just somewhere to store your bits and bobs, whip out a pad of paper and get weaving! Scroll down for the how to.

diy baskets | south by north

You will need:
– thin sheets of A3 paper cut in half long ways
– a vessel with straight sides such as a jam jar
– a stick of paper glue
– a kebab skewer
– spray paint (optional)

Starting in one corner, roll a piece of paper around the kebab skewer all the way to the diagonally opposite corner. Add a few dabs of glue to fix the corner in place and pull the kebab skewer out. You should have a long thin tube of paper. Do the same with all of your pieces, you will need around 30 tubes to make both baskets.

diy baskets | south by north

Take an even number of paper tubes and lattice them together. For the jar sized basket I started with six paper tubes, for the larger one I used eight. Take one of the outer tubes that is sitting under the lattice, and weave it over the tube next to it. Continue to weave over and under, splaying the tubes out as you go. When you are an inch or so from the end, dab some glue on the woven tube and slide a new paper tube on top. Continue to weave under and over, adding paper tubes as you go.
Once you have made a base the same size as your vessel, place the vessel on top and start to weave around it, pulling the paper tubes upwards tightly around the jar. At the top, take out the jar and weave the lose end into the basket discreetly. Tuck the ends that are sticking up either down the outside or inside, and trim if needed. Use spray paint to decorate as desired!

diy baskets | south by north

diy baskets | south by north

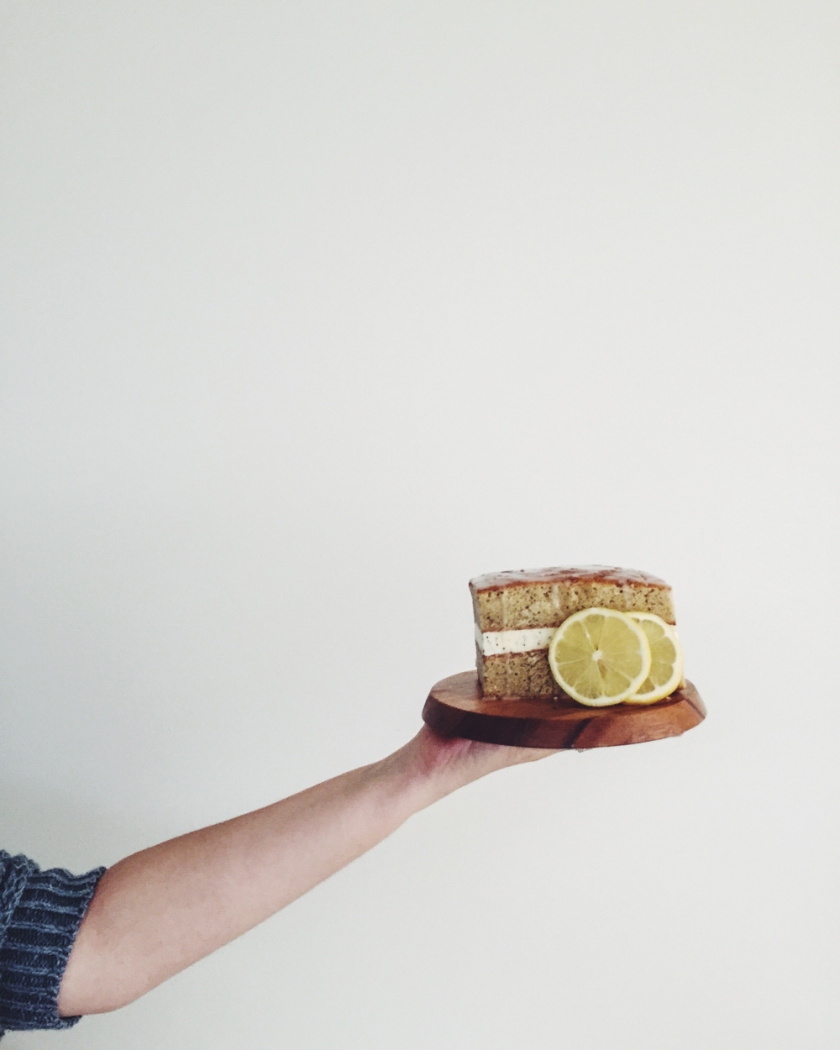
ice cream series: lemon drizzle ice cream cake

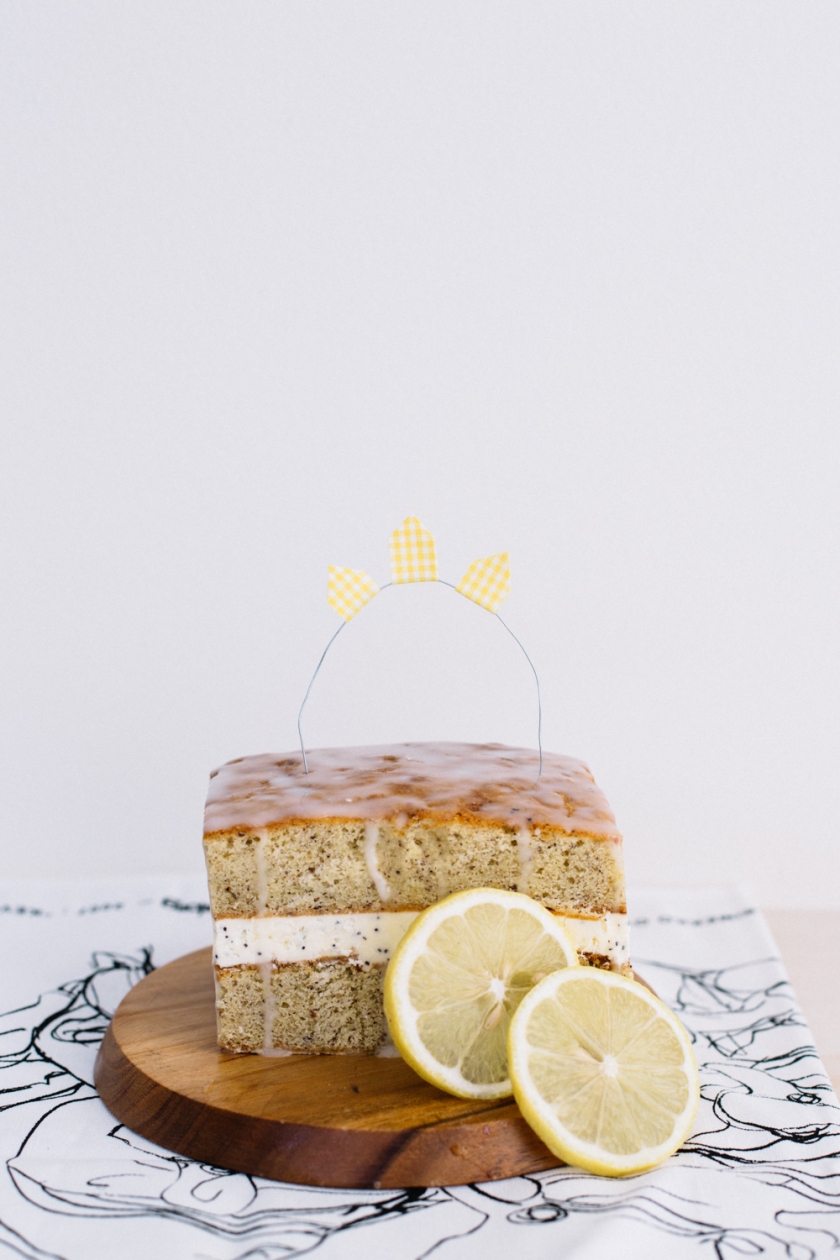
lemon drizzle ice cream cake | south by north

Ok, we are officially taking this ice cream thing to the next level.  Last time pie, this time, CAKE. My stomach is happy about this turn of events.

This time I had a hankering for a classic lemon drizzle but wanted to put a frozen spin on it. My first thoughts were to incorporate lemon sorbet, but so far I have not been overly successful with sorbet, plus all of the lemon flavour should really be in the cake. I settled on a poppyseed ice cream filler, sandwiched between two layers of lemon cake, with a satisfyingly tangy/sweet lemon drizzle icing. This cakey sandwich thing is the perfect size for two if you want to spend an evening wedged into the sofa like a sealion, unable to move because so full (except to hit ‘yes I’m still here’ on Netflix) – sounds great to me. Scroll down for the recipe.

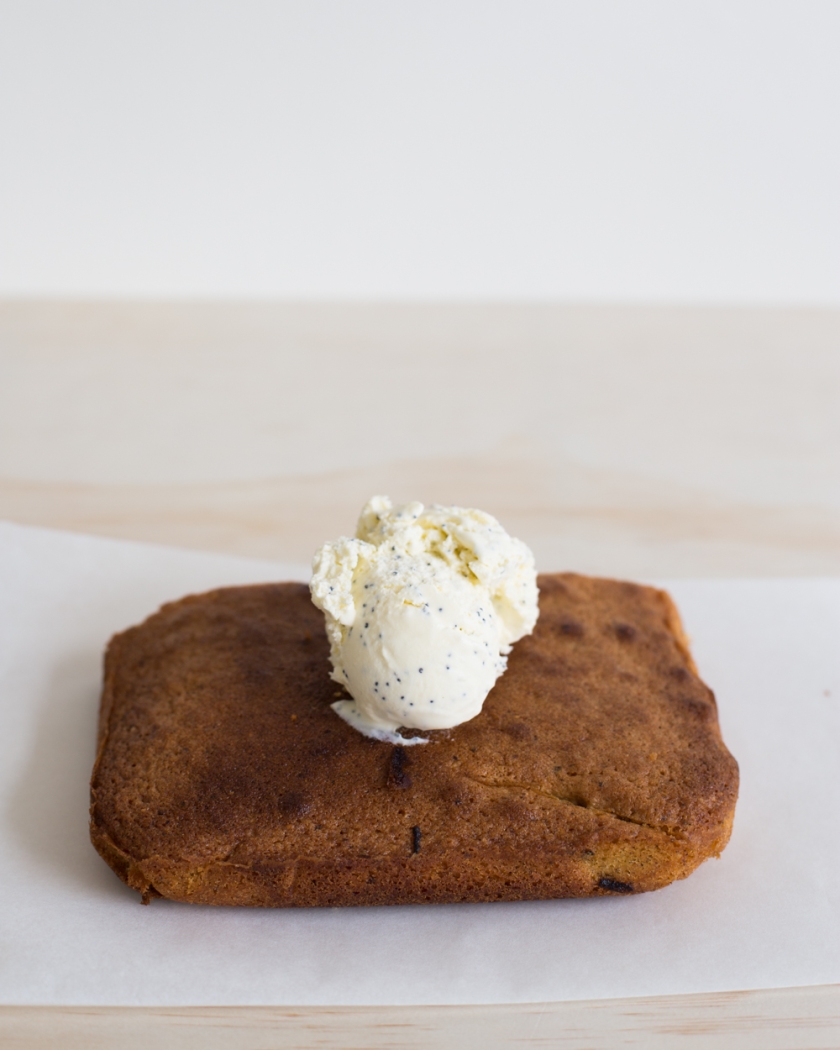
lemon drizzle ice cream cake | south by north

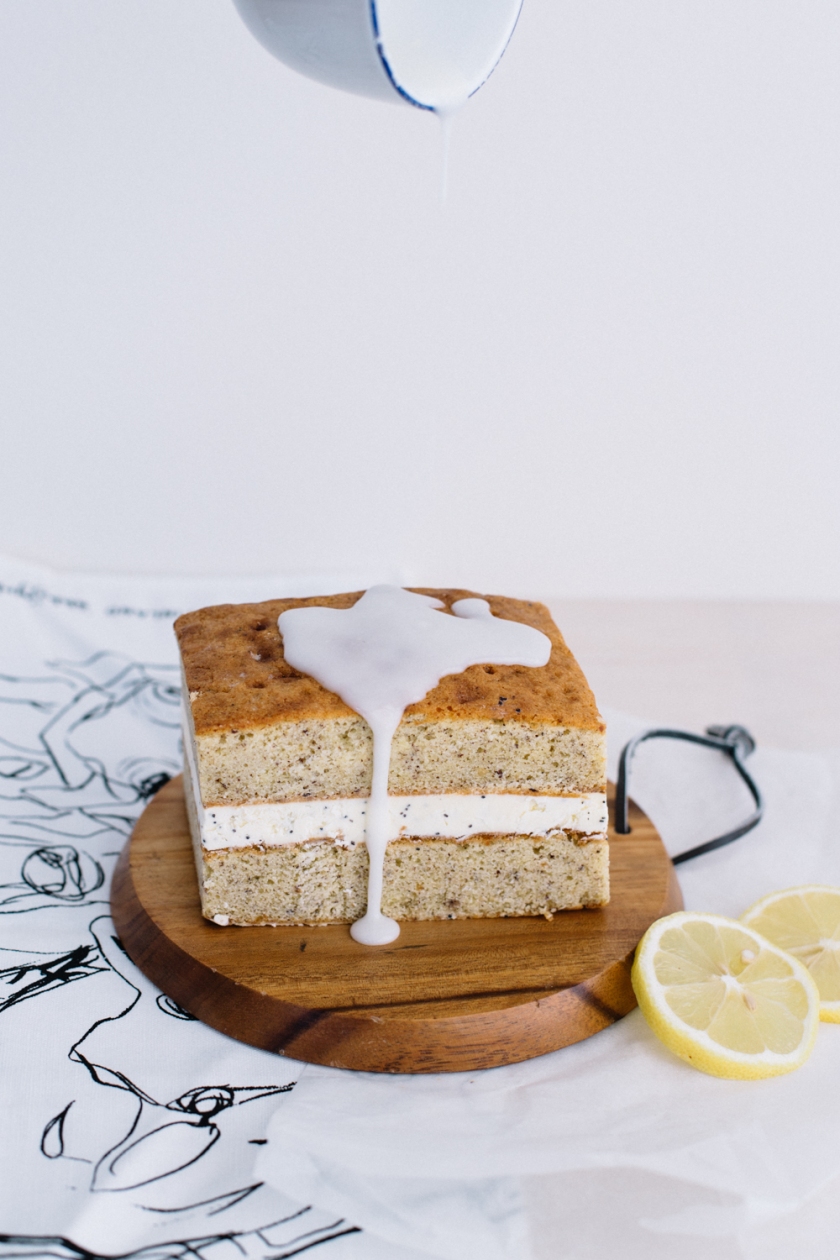
lemon drizzle ice cream cake | south by north

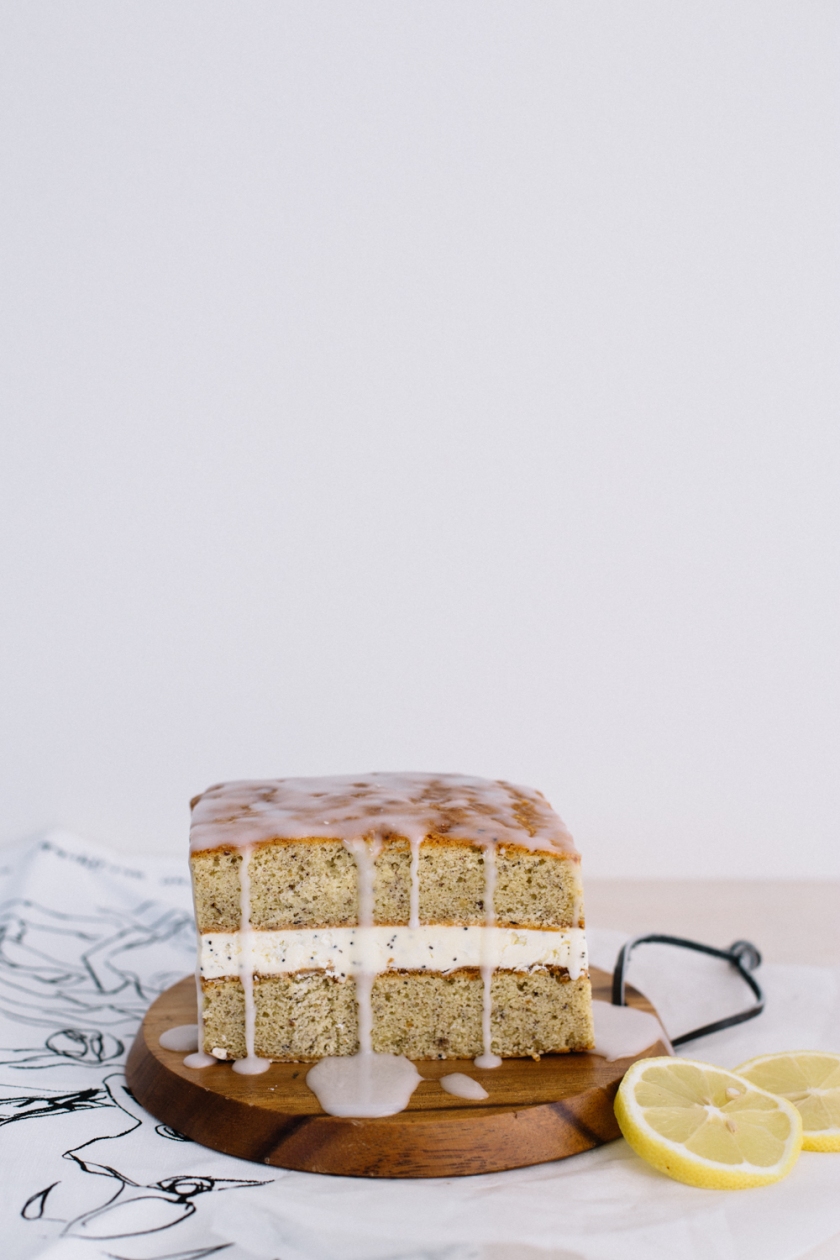
lemon drizzle ice cream cake | south by north

lemon drizzle ice cream cake | south by north

The cake.

For the lemon cake, you can use a tried and tested recipe – or follow this one like I did. I won’t write it out here because I didn’t make it up. Although I did have to replace almond meal with hazelnut meal at the last minute because that is all I had in the cupboard, and it still turned out great! You will need to bake this in a shallow rectangular tin, so the baking time will be significantly reduced. I left mine in for about 35 mins instead on 55.
If you choose a different recipe make sure it has a good amount of sugar in it to keep the cake nice and soft when it is frozen.

The poppyseeed ice cream.

You will need:
– 300ml heavy cream
– 1 cup of sugar
– packet of poppyseeds
– 1 teaspoon vanilla essence
– skim milk powder

Heat the cream and sugar over a low heat until the sugar has dissolved. Remove from the heat and transfer to a large bowl. Whisk through the vanilla and skimmed milk powder. Once combined, store in the fridge til cool.
Churn the mix according to your ice cream maker and once it starts to get thick, add the poppyseeds a tablespoon at a time, around 5 tablespoons in total. The churning will mix them through.

The drizzle.

Easy peasy. Three table spoons of lemon juice mixed with a load of sieved icing sugar over a very gentle heat, until you get a thick but runny consistency. The icing should be slightly warm, not hot.

Assembly.

Take your ice cream out of the freezer to soften a bit. Cut the cooled cake in half, and spoon ice cream on top of one half, pressing and smoothing it with a palette knife. Layer the other half of the cake on top, don’t worry if it is dripping down the sides! Wrap the whole thing tightly in clingfilm and pop back in the freezer.
Once the ice cream has thoroughly refrozen (about 24 hours), remove the cake from the freezer and slice off the edges with a sharp knife, taking as little as possible. This should reveal the perfect layers underneath.
To serve, remove from the freezer around 15 mins beforehand and poke a few holes in the top with a skewer. Right before serving pour the drizzle over the cake and let it drip down the sides.

lemon drizzle ice cream cake | south by north

diy: banner cookies for a subtle revelry

say it with cookies | south by north

I can’t imagine anything more delightful than receiving a message banner written out in cookies (not really surprising, I have a habit of writing stuff in my food). A simple, ‘yum’ is short and sweet, but you could say whatever you like, it all sounds better in cookie. And these babies will hang up anywhere for a sweet surprise.

This is a little diy/baking project that I put together for A Subtle Revelry, using a few simple supplies and some alphabet cookie cutters. You can see the full tutorial here.

Go on, say it with cookies!


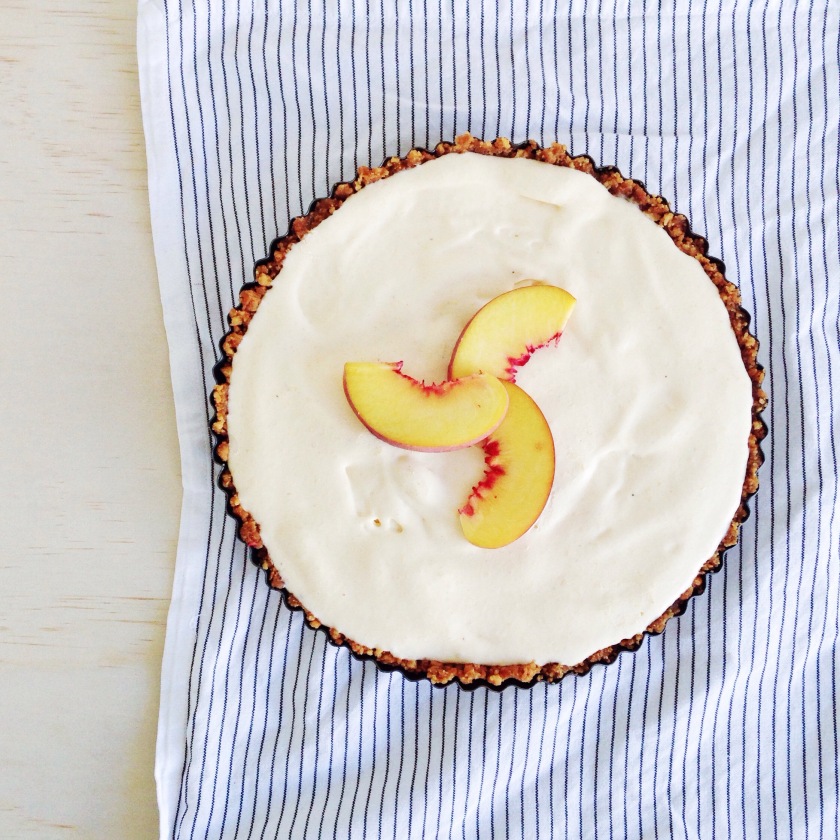
ice cream series: peach and ginger ice cream pie

peach and ginger ice cream pie | south by north

I made some ice cream!! Hells yeah. And seeing as it has been so long, it would be only fair to take this ice cream to the next level and make it into a pie. Why on earth didn’t I do this sooner?! It feels like my barely-used pie tin has redeemed itself from the burnt polymer clay incident of 2014, and finally fulfilled it’s destiny with this recipe.

The ice cream is pure peachy goodness, with the hintiest hint of spice. The crunchy base is chunky and buttery, and made from a whole packet of ginger nuts. I could make a joke about juicy peaches and ginger nuts, but I won’t because I’m classy. Ahem. Scroll down for the how to.

peach and ginger ice cream pie | south by north

peach and ginger ice cream pie | south by north

peach and ginger ice cream pie | south by north

For the ice cream you will need:
– five ripe peaches + extra for garnish
– one cup of sugar
– two cups of heavy cream
– one teaspoon of nutmeg
– one teaspoon of vanilla essence
–  two tablespoons of Aperol (optional)
– a pinch of salt
– squeeze of lemon

For the pie base you will need:
– one packet of ginger nut biscuits
– 100 grams of butter

Make the ice cream first, starting with a peach puree. Peel and chop the peaches and place in a medium saucepan with the sugar, vanilla, Aperol (if using), nutmeg and salt. Keep stirring over a low heat until the sugar is fully dissolved and the peaches have started to break down.

Pour the mixture into a heat proof container that is safe to use with your hand blender, and blitz the peach and sugar mix. If your blender is the splattering kind wait for the peaches and sugar to cool a bit. Run the blitzed mixture through a fine seive, collecting the puree in a large bowl. Add a small squeeze of lemon to the puree and stir. Add the cream to the puree and stir thoroughly. Cover, and chill the mixture in the fridge.

While the mixture is chilling make the pie base. Use a food processor to turn the biscuits into crumbs – a mix of fine and a little chunkier gives a nice texture. Melt the butter in a small pan and stir the biscuit crumbs through. Press the crumbs into your pie tin (be careful, they will be hot!), cover and leave to set in the fridge.

Once the ice cream is chilled, churn according to the instructions on your mixer. Pour the churned ice cream into your pie base and leave the whole pie to set in the freezer. Serve straight from the freezer, with extra peach slices for garnish.

See more South by North recipes here, and follow along with the ice cream series here.

peach and ginger ice cream pie | south by northpeach and ginger ice cream pie | south by north